Google Analytics has been going through some major updates. And it’s not just the name: everything has changed. We’re now officially transitioning from our beloved Google Analytics UA to Google Analytics 4.
In case you don’t know what we’re talking about, let us explain: in late 2020, Google renamed its App + Web properties to Google Analytics 4 and officially graduated from beta. This means that from now on, the default property (when you create a new one) is GA4. It is a completely revamped platform. New interface, new tag template in Google Tag Manager, new data model, etc. Why the new platform? We can discuss that another day, but long story short, it mostly comes down to Google’s goals for a cookieless future.
We highly recommend businesses start setting up and familiarising themselves with GA4 now before the ultimate switch-off of Google Analytics Universal Analytics (stated to happen on the 1st of July 2023 at the time of writing this blog):
“On July 1, 2023, standard Universal Analytics properties will no longer process data. You’ll be able to see your Universal Analytics reports for a period of time after July 1, 2023. However, new data will only flow into Google Analytics 4 properties.” – Google
However, this raises many questions, one of those being, “where do I start?”
If you are not sure how to get started with Google Analytics 4 (GA4), you’ve come to the right place! Because in this Google Analytics 4 walkthrough, we’ll show you exactly that.
1. How to set up a GA4 property
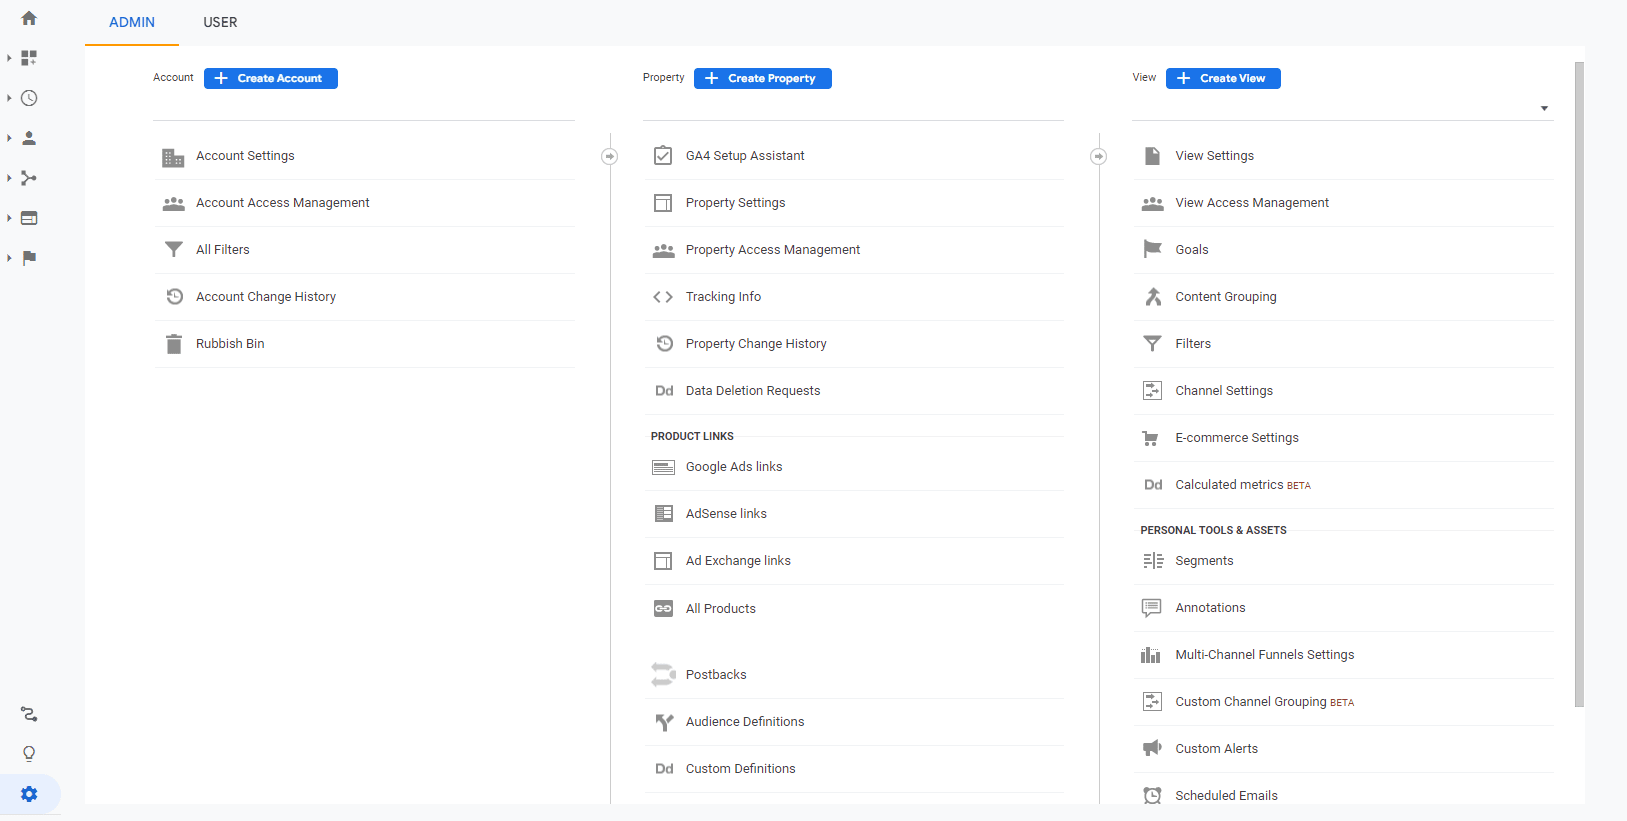
First things first, open up Google Analytics, if you already have an existing account. To start the setup of your new property, you’re going to want to go to the Admin panel (the cog at the bottom left of your Google Analytics account).
Under the Property Section (middle panel), you need to click the blue button titled “Create Property”.
Here, you just need to fill in your Property Name (we recommend the name of your business/website + GA4), your time zone and currency.
Then, hit “Next”. You should now have a GA4 property in your Google Analytics account. However, it won’t track any visitors just yet. To find out how to do that, read the next section.

2. How to get GA4 tracking visits using Google Tag Manager
At the time of writing this blog, there weren’t too many direct API integrations with major CMS’ like Shopify and WordPress to make the setup of tracking as seamless as possible. Because of this, we recommend using Google Tag Manager to set up your GA4 property. If you haven’t already got a Google Tag Manager account set up, we highly recommend reading our recent blog on getting started with Google Tag Manager (GTM).
Assuming you already have your GTM account set up and linked to your website, to send pageviews and user information to Google Analytics 4, you’ll first need to ensure a couple of things:
- Your variables are set up
- You have a pageview trigger set up within the account
Set up variables
To set up your variables, go to the tab on the left labelled “Variables”.
In here, click “Configure” and simply tick all items under Pages, Clicks and Forms (these will depend on your tracking needs, however, these are the most common variables that most websites use as a base for tracking).
Set up a pageview trigger
Triggers in Google Tag Manager are how you indicate what exactly it is you want to track and send to the platform in the form of a tag. In this case, we want to send pageview data, as we simply want our Google Analytics 4 (GA4) account to start tracking overall pageviews.
To set this trigger up, if you haven’t already, go to “Triggers” on the left side of Google Tag Manager and hit “New”.
In here, you want to hit “Trigger Configuration” to start the setup of your new trigger.
Our trigger will be a pageview trigger, so click “Page View” on the right side panel. Then, name your trigger and save.
Want to read more about GA4? Try our blog: Why I’ve Changed My Mind About GA4 (Google Analytics 4)
Connecting Google Tag Manager and GA4 with a Tag
Now that we have our variable and trigger, we’re going to need to send this pageview data to Google Analytics 4 (GA4) to get it up and running. To do this, you’ll need to go to “Tags” on the left side of Google Tag Manager.
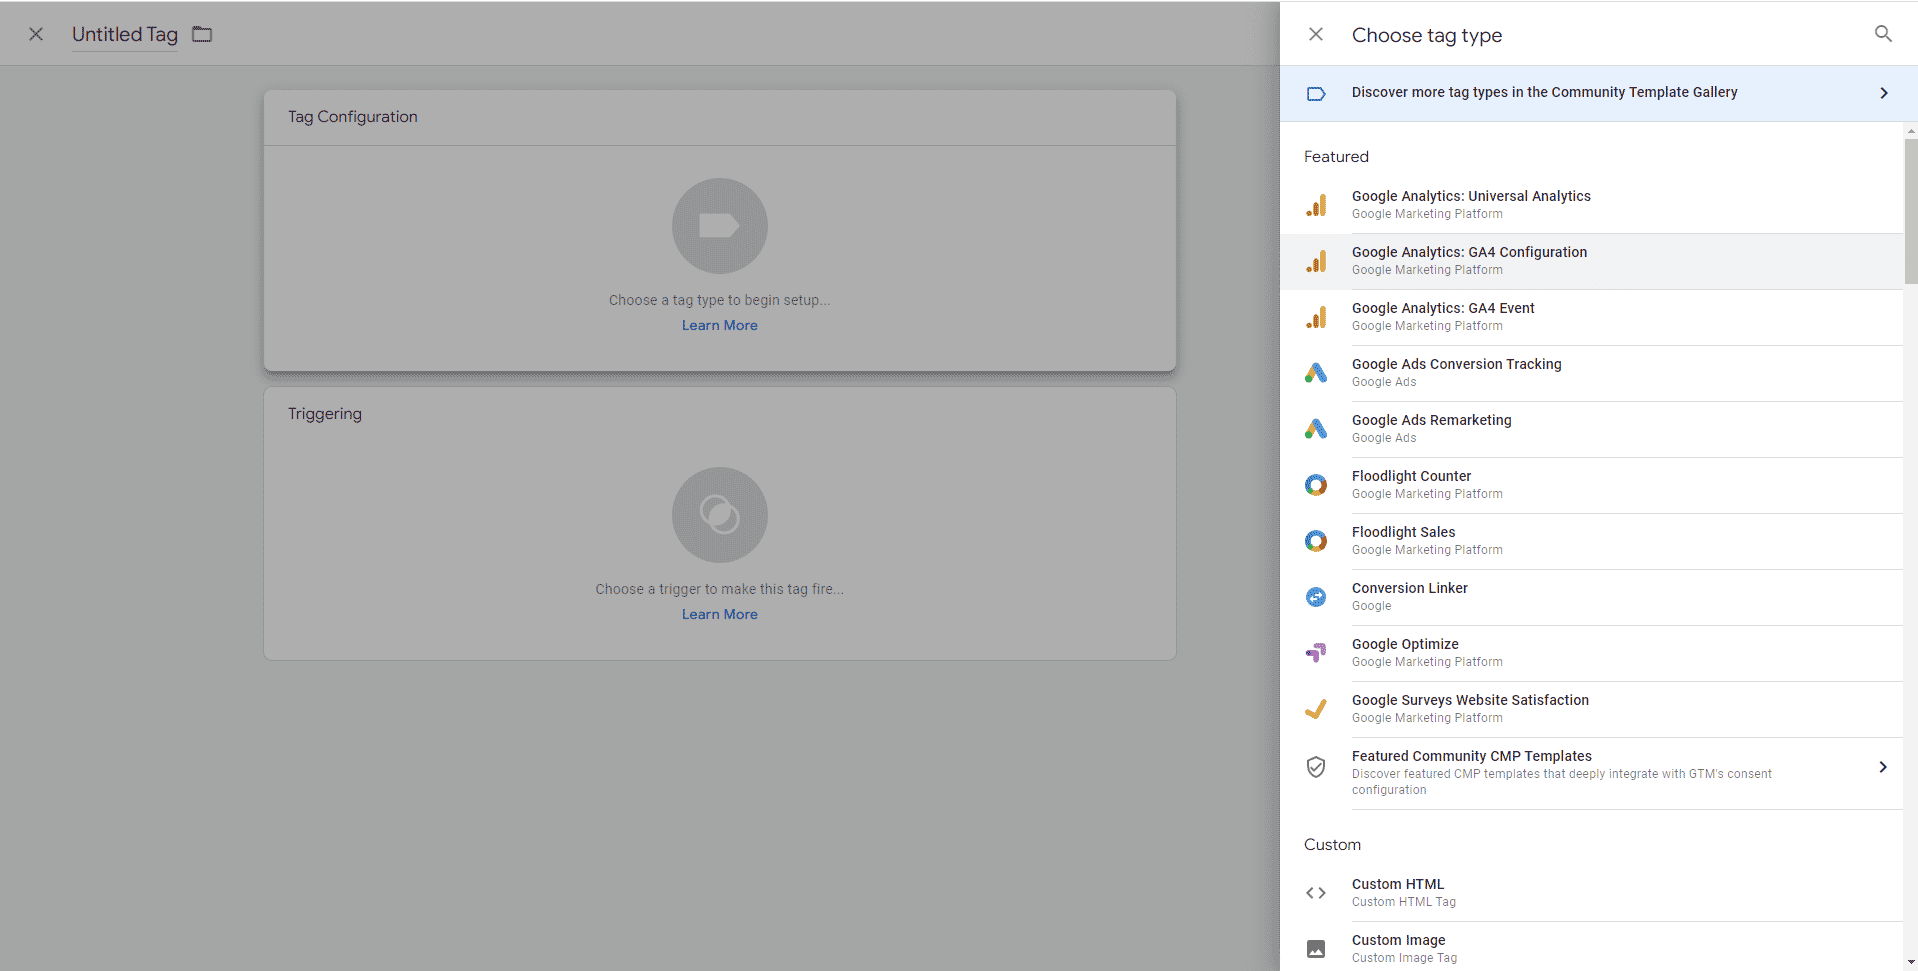
In here, create a new tag using the Page View trigger you’ve created and add in “Tag Configuration” click “Google Analytics: GA4 Configuration”.
Doing this will prompt Google Tag Manager to ask you for a Measurement ID. To get this, we’re going to need to go to your new GA4 property you just created.
In your GA4 property, go to Admin on the bottom left.
Here, go to Data Streams and create a new web data stream if you need to. Once this is created, you should be able to click into your new data stream and at the top right you will find your Measurement ID.
Copy this and paste it in your new Google Tag Manager configuration tag.
Once you have saved this new tag, you will have completed all the steps to set up. The last thing you need to remember to do is to publish your changes on Google Tag Manager by going to the top right and clicking “Submit” then publish.

3. Start seeing traffic coming to your new GA4 property
Depending on the level of traffic your website draws in, you may need to wait a few minutes before you start to see traffic pulling through to your brand new GA4 property.
And with that, a massive congrats to you, you have just taken the plunge and switched to Google Analytics 4! Soon, we’ll be releasing a blog containing a walkthrough of how to set up Events in GA4, so make sure to keep an eye out if you would like to learn more about gathering data in your new Google Analytics 4 account.
![]()


